 Tempting, huh? Wanna see what's in it? Wanna learn how to make it? Read on!
First of all, I have a confession. I don't have a cutting machine, but I would love one. I drool over projects in the idea gallery by Regina Easter, who is amazing with personal cutting machines. As a result of this absence in my crafting life, I make due with things I have hanging around. My husband has called me the MacGyver of crafting because I resort to some weird, weird stuff.
Lately I've been really in to circles. A nice crisp clean circle is charming on a card, perfect for kids crafts and necessary for some fabric crafts. Where do I go for my circle tools galore? Why, the kitchen, of course!
 Look at all those circles, just waiting to be used and outlined. I think one of my primary go-to circles is the lid of my peanut butter jar. That size circle works for dozens of projects! Of course, I first double check to make sure there's no peanut butter on the lid.
For today's occasion, I have printed out an image for a birthday card. The image is the letter "a" from DB Party Animals scaled up to around 200 point font size. After examining my toolbox, I discovered that the lid to my peanuts is perfect.
 Next I need a slightly larger lid for a paper mat. A little more kitchen wandering, and there it is! It's the lid of my sugar canister. Perfect.
 Gently outline with a pencil (keeping the pencil at a 45 degree angle all the way around the edge)....
carefully cut exactly on my drawn circle...
and voila! Two perfect circles.
 And a little while later... a finished card! Yay! I found a nice font to compliment my image in Scrap Round.
 But I'm not done with my circles yet. I need to make that cute little envelope wrapped up like a present to hide this darling little elephant. That means, back to my circle toolbox! I need to find a circle that is just slightly taller than the entire card.
There it is. Thank you, Mr. Quaker.
 Trace and cut out four circles of the same size.
 Fold each paper circle exactly in half. Fold crisply.
 Arrange the folds together in a square, carefully overlapping each circle under and over the circles next to it.
 Without too much moving around, squeeze a little glue under each overlap. Before the glue is dry, make sure to bring the circles tightly together in the middle, so there's no hole in the middle.
 Here is your envelope. Gosh darn, this is so cute you could make this into the card itself! Just slap a pretty square piece of paper right in the middle with your message.
 But not today, not for me. I have a charming, playful little elephant who wants a home. In he goes!
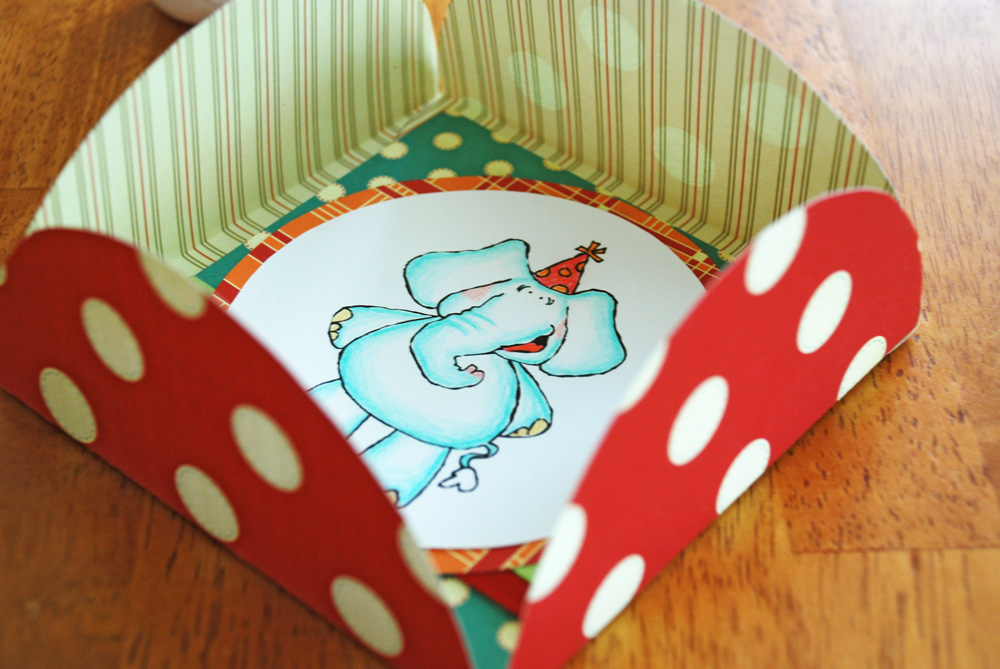 Carefully fold each flap down, tucking the last one in so each flap overlaps the one next to it.
 Here is my completed envelope:
 Now for the final fun touch! A ribbon wrapped around the whole kit-n-caboodle.
 And there it is! There is your circular gift, just waiting to be given away. I promise it will bring a smile to the lucky recipient. Happy crafting!
If you like the hand-drawn image I used of the elephant with the party hat, you should hop and skip over to scrapNfonts and check out other hand drawn doodlebats. There are tons to choose from! I used paper from Cosmo Cricket's Lil Man collection.
Shop ScrapNfonts.com for the widest variety of craft and scrapbooking fonts, DoodleBats, WordArt and Brushes.
